Category Archives: Uncategorized

Lasercut Dual Vertical Cinema Display Stand

front
Front view
back
Back view

Last week was HackWeek at Square, and as usual I took the opportunity to stretch my maker legs. This time I decided to tackle a practical problem that’s on my horizon – or perhaps more accurately, in my peripheral vision.

My current workstation has two Apple Thunderbolt Displays. This is, as you might imagine, awesome. There’s tons of desktop real estate to lay out browsers and code and terminals. However, this setup does have a dark side: it’s 50″ wide! Not only does this require me to pan my head to see the far edges of the most distant windows, but it’s actually wider than the desk space allotted to me. As soon as someone moves into the vacant spot next to me, one of these bad boys will have to go.

Faced with the prospect of giving up one of my beloved monitors, I hatched a plan to rotate them both from landscape to portrait. The traditional way to achieve this sort of thing is through the magic of the VESA mount. A lot of monitors have this built in, but not Apple displays. (After all, who wants to see a bunch of extra screw holes on the back of their perfectly sculpted monitor?) Apple sells an add-on VESA mounting kit, which is apparently an enormous pain in the butt to install. (You know it’s a bad sign when a how-to includes fast motion.) Luckily, the Square IT team had a pair of the older Cinema displays with the

VESA mount already attached so I could experiment.

Once your monitors are ready to be mounted, you need a stand. There are commercially available stands of all sorts, but that’s no fun, so instead I designed a custom stand using my favorite tool of choice, OpenSCAD. I wanted something that would be cheap to fabricate and easy to assemble that would still turn out handsome and sturdy. This led me to choose laser-cut birch plywood and the standard T-slot style screw-together construction.

By far the hardest part of this project was getting all the geometry correct. I wanted the monitors to come together very precisely, so I had to lay out the mounting points by carefully computing a bunch of different angles. There were more than a few head-scratcher moments spent hunched over a notepad. (Lesson learned here: start your sketches much bigger than you expect if you’re planning to add a lot of little annotations for angles and segments.)

This version seems to work pretty well, though I’m still planning to to a nice sanding, staining, and clear-coating pass to make it extra presentable. I also set my personal best for time from conception to realized prototype – I started sketching on Tuesday afternoon and had the stand built by noon on Friday.

As usual, all the project files are available on my GitHub page. If you’re thinking of making one, let me know!

Custom standalone programming fixture

I spent my evenings over Memorial Day weekend working on a customized fixture designed to make programming and testing the electronics of our Question Block Lamp really easy. As part of our plan to bring the lamps back into production, we decided that a custom programming fixture would go a long way towards helping our outsourcing partner get exactly what we want quickly and without the difficulty of communication. (Emailing back and forth to China is actually pretty expensive – a simple back-and-forth exchange can take days, thanks to the time difference.)

Once we decided to build this device, I jumped in and started designing. I had a few clear design criteria:

  • It should be durable. It will be used to program thousands of units. (Hopefully, tens of thousands!)
  • One part or another will ultimately break down, so it has to be modular and easily repaired,  particularly by someone other than me.
  • It should be incredibly intuitive to use. After all, it’s not even clear that the people using it will speak English!

Here’s what I ended up building:

2013-05-24 23.21.00

The interface

The interface is very simple. The strip of LEDs down the right hand side indicate the state of the programmer. The top one is just power, so you know it’s on. The next is the “contact” indicator, which lights up when a target board is properly connected. After that is “working”, for when the programmer is programming, and then “success” and “failure”. I etched the descriptions next to the LEDs, but used different colors so that it’s clear even if you don’t read the text. You start the programmer by pressing the only button on the faceplate, marked “Go”.

The enclosure

The exterior of the device is laser-cut 3/16″ acrylic. We just happened to have clear laying around, but I think that a more opaque color might work out better. I used standard T-slot style construction to put it together, with the exception that I used long screws from the top to the bottom to make a sort of sandwich. All the fasteners are #4-40, which I’ve found to be a great size for these small-scale enclosures.

A big part of the combined electronic and enclosure design process was rendering the whole thing in OpenSCAD, my 3D design tool of choice. I personally find it really crucial to be able to visualize how all the parts will go together before I settle on details of a design. Here’s the final render I ended up with:

standaloader_render

The hardware

On the inside, the components are simple by design. The brain of the whole operation is just a plain old Arduino Uno. I chose to use an Arduino as the driver for the programmer for a few reasons: I’ve used the ArduinoISP sketch a lot in the past very successfully; there was already existing code to convert an Arduino into a standalone programmer; the USB port and barrel jack were the only connectors I needed; and Arduinos are completely ubiquitous and easily replaced.

In addition to the Arduino, there are a few custom components. First, there’s a shield I designed that mates with the Arduino and provides all the connection adapters to the two other peripherals. It also has a handful of resistors for lighting the LEDs and a capacitor to suppress the auto-reset that occurs when a computer connects to the USB port – a must-have when operating as an ArduinoISP. Next is the interface board, which is basically just an LED array and the Go button – not much to see there.

The most interesting and challenging to fabricate component is the pogo pin array. I took inspiration on how to make this thing from a number of other pogo pin projects I’ve seen across the web. I made a point of breaking this out into a separate module so that I could isolate “fragile” electronics like the Arduino from any sort of mechanical stress. I found that setting the pin height was a little fidgety, and I’m going to experiment with alternative techniques for that the next time around.

The code

I based my programmer code very heavily on the existing AdaLoader project. However, there were a number of tricky issues I had to chase down to get it to work in my application. The original version was designed for flashing bootloaders onto ATMega168 chips, and there are some assumptions baked in to match that choice of target. Since I am flashing ATTiny44 chips instead, I needed to figure out the mismatches and update accordingly.

The first step was spending some time with the ATTiny24/44/84 datasheet to get some information like the chip signature. Next, I had to capture the hex file of my compiled code. The Arduino UI creates this file already, but it puts it in a random location every time. Finding it is pretty easy if you turn on the debug logging feature. (Basically, just set upload.verbose=true in your preferences.txt file.) After that, the path to the hex file is displayed in the window at the bottom every time you build/verify.

With the hex file in hand, I ran into my first real issue. For some reason, even though my program was actually laid out in contiguous memory, the hex dump produced by the Arduino IDE broke it up a bit towards the end. The AdaLoader code didn’t like this – it expected every hunk of data in the hex dump to be full and got confused when it wasn’t. I ended up writing a short Ruby script to transform the hex file into a clean, contiguous dump. I couldn’t quite figure out what I was doing wrong when trying to calculate the line-ending checksums, but I wasn’t really worried about data integrity between my laptop and the Arduino, so I ended up disabling that feature.

At this point I ran into my second issue – really, a pair of issues. What I was seeing is that the flashing would complete, but when the programmer read the bytes back to verify them, it failed, saying that the values were wrong. Uh oh. This was a real head scratcher for a while, so I spent some more time reading the datasheet. The first issue I found was that while the ATMega168 has a 128-byte flash page size, the ATTiny44’s was only 64. That was concerning, so I changed the settings, but the problem persisted. After reading the code very carefully for a while, I managed to debug it to point where it looked like it was flashing two different chunks of data to the same memory address. In fact, there was an odd pattern of alternating correct addresses and incorrect addresses aligned on 128-byte boundaries. (0x0 -> 0x0, 0x40 -> 0x0, 0x80 -> 0x80, 0xC0 -> 0x80…) This turned out to be because the target address was being masked with a pattern that aligned on 128-byte boundaries – clearly a relic of the code’s prior purpose. I just removed the mask altogether and all of the sudden everything started working!

What I have now is a device that can be powered by a simple wall wart and will program an un-flashed board in about 5 seconds, much faster than if we were doing it with the computer attached. Woo hoo!

There are a few next steps for this project before I’m considering it done. The programming part of the device is important, but so is the testing part. I’d like to figure out how to make the programmer put each newly-programmed board through it’s paces briefly so that we can identify defective boards early, before they are glued inside finished lamps. Also, there are a handful of places where the part tolerances of the laser-cut parts aren’t perfect, and making another copy gives me the opportunity to correct those mistakes. The version that I end up sending to China should be a bit more polished and feature-packed.

How to impress me in a coding interview

At Square, candidates are expected to actually write code during the interview process – on a computer, not on a whiteboard. As a competent software developer, this kind of interview should feel like a gift. Your skills are going to be measured more or less directly by doing the very thing you’ve been doing all these years!

So how do you impress me – or any interviewer – in a coding interview? Here are a few things I consider when pairing with a candidate.

It’s about the process

First off, let’s deal with a myth: the interview is not about the answer to my question. Sure, I’d prefer that you get it right, but I’m far more interested in seeing how you work to get there. I want to see how you decompose problems, conceive solutions, and debug issues as they arise. Make sure you take the time to show me how you’re getting to the answer.

It’s about communication

A big part of the development process on a healthy team is communication. Ideally I’d like to leave the interview feeling like you’re someone who asks good questions and is receptive to feedback and external insights. A great way to blow this portion of the interview is to hunch over a notepad and scribble quietly while I wait. If you must do something like this, be prepared to explain your thoughts thoroughly when you’re done.

Don’t go it alone

My interview exercise is hard. I fully expect that you might need a hint at some point. I even enjoy working with you to debug the problems you hit as you work. But if you never ask, you’re not going to come out ahead. Coding on a real team often involves working on something that you don’t understand, but that the person sitting two seats down knows in detail. You should be self-sufficient only insofar as it makes you productive; spinning your wheels trying to go it alone is just indulgence.

You should run the interview

Don’t make me march you through all the steps. Once I’ve explained the exercise and you’ve started coding, it’s best if you drive. If you need help, ask. If you think you’re done, propose more test cases or ask for my thoughts. The best interviews I’ve had are more like working with the candidate than interviewing them. If you can do this in an interview setting, then I can believe you’ll work the same way when you’re on my team.

Use the tools

I am consistently impressed when a candidate is able to drop into a debugger or quickly access documentation in the IDE of their choice. It’s an aspect of professional mastery that will be extremely important to your day to day productivity. The inverse is also true – if you choose to write C++ in vim and don’t know how to save the file, it’s going to cost you.

No bonus points for doing things the hard way

One of the key attributes I select for in coworkers is pragmatism. Sometimes this means choosing an ugly but expedient solution instead of an elegant but expensive alternative. If you know when to make these tradeoffs, you’re someone I want to work with. A lot of candidates feel pressure to give me “perfect” solutions right away, but I’d rather see an answer than an incomplete, perfect one. Plus, I love it when we can iterate on the “quick and dirty” solution to build a refined version. This is how software works in the real world, and I love when candidates aren’t too self-aware to just go about it casually.

Moving on

In a turn that few will have seen coming, this coming Friday will be my last day at Rapleaf. After five years, I’ve decided that it’s time to move on and seek new challenges. To that end, after much consideration, I will be joining Square to help them scale up their analytics efforts. I’m incredibly excited to get to work with a new team on a totally new problem domain, and I believe I have a ton of value to add to the company.

This decision is exquisitely bittersweet, though. It’s difficult to even begin to describe how spectacular my time at Rapleaf has been. I found it telling that when I tried to sit down and write a summary of my experience for my resume, it seemed impossible to summarize all that I had learned and done. This is still totally insufficient, but I’ll boil it down to this: I was given the opportunity to make many amazing software systems; I was allowed to grow into a member of the broader engineering and open source community; I learned the meaning of scale; I got to be a real owner of the business’s direction and purpose; and I played a role in building a world-class team.
It is this last point in particular, the team, that puts the tears in my eyes. I have never before had the opportunity to work with so many brilliant, hard-working, interesting, and just generally nice people, and I am humbled and honored to have been counted among their number. My greatest worry – one which I consider not wholly irrational – is that the team I’m leaving behind is in fact of the rarest kind, and I’ll spend the rest of my career hoping to rebuild something as great.
To everyone I have worked with over these last five years, thank you for everything you have taught me. You are what has – and will continue to – make Rapleaf great. 
Let’s do this again some time.

Open Source, Forking, and Tech Bankruptcy

Open source software is a part of most of the things I do day-to-day. I use a ton of things made by others: Hadoop, Cascading, Apache, Jetty, Ivy, Ant – the list could literally go on for pages. But I also use and develop some things that I’ve built that have been released into the public. I contribute to Thrift frequently, and have released Hank, Jack, and other projects as part of my work at Rapleaf.

Working with so much open source software has given me lots of opportunity to develop perspective about how companies should engage with open source projects. In this day and age, nobody is going to counsel against using open source, since it’s an enormous productivity booster and it’s everywhere. However, there are some different schools of thought about how you should use and contribute to open source.

One way of using open source is to just use what’s released, never make any modifications, and never make any contributions. For some projects, this is perfectly fine. For instance, I find it hard to imagine making a contribution to Apache Commons. Everyone will take this approach on some projects, particularly the ones that are mature and useful but not mission critical: they’ll never produce enough pain to merit fixes nor produce enough value to merit enhancements.

However, the above model only works well on projects that are very stable. Other projects you’ll want to use while they are still immature, unstable, and actively developed. To reap the benefits, you might have to roll up your sleeves and fix bugs or add features, as well as dealing with the “features” introduced by other developers. This is where things get tricky.

There are two basic ways to deal with this scenario, which I think of as the “external” and “internal” approaches. The external approach involves your team becoming a part of the community of the project, contributing actively (or at least actively reporting bugs and requesting features), and doing your best to hang onto the bleeding edge or commit to using only public releases. The “internal” approach involves you picking an existing revision of the project, forking it into some internal repository, and then carefully selecting which upstream patches to accept into your private fork while mixing in your own custom patches.

Both of these options are imperfect, since either way you’re going to do a lot of work. A lot of companies see this as a simple pain now/pain later tradeoff and then choose accordingly. But I don’t think this is actually the case. What’s not easy to appreciate is that the pain later is usually much, much worse than the pain now.

Why is this the case? It comes down to tech debt. Choosing to create an internal fork of an open-source project is like taking out a massive loan: you get some time right now, but with every upstream patch you let go unmerged, you are multiplying the amount of effort you will ultimately need to get back in sync. And to make matters worse, people have a tendency to apply custom patches to their internal forks to get the features they need up and running quickly. This probably seems like a great idea at the time, but when it’s done carelessly, you can quickly get into a state where your systems depend on a feature that’s never going to make it into the upstream and might actually conflict with what the community decided to do.

When you get into the situation where your fork has diverged so much that you find yourself thinking, “I’ll never be able to switch to upstream,” then you’ve reached a state of tech bankruptcy – literally the only thing you can do is give up and stick with what you have or commit to an unbelievably expensive restructuring. At this point you cease to have a piece of open-source software: you have no external community, nobody outside to add features, fix bugs, and review your code, and you can lose compatibility with externals systems and tools.

Needless to say, the decision to make an internal fork should not be undertaken lightly. Weigh the perceived stability and flexibility benefits very carefully before starting down that road. If you must fork, make sure you understand the costs up front so that you can budget time to keep your fork in sync.

There’s a flip side to this. How often does a piece of internal code that “could be” an open source project go from closed to open? I know from my experience that it’s not easy to make the transition – you end up building in a feature that’s too domain-specific, or you tie it to your internal deploy system. I think that writing a decent piece of software that could be spun out as an open-source project and yet failing to do so is another case of accumulating tech debt. In this case, the bankruptcy state is a project that could have been open but never will be because of the time investment required.

The prescription in this case is easy: open source your project early, perhaps even before it’s “done,” continue to develop it in the open, and whatever you do, use the version you open sourced, not an internal fork.

Custom languages considered harmful

I use and contribute to a lot of open-source software projects, and one thing I see all over the place that drives me absolutely nuts is the prevalence of custom languages. In serialization frameworks, there are interface definition languages. In CAD tools, there are modeling languages. In the NoSQL and big data processing world, you’ll find my personal pet peeve, query languages.

Why are people making these custom languages? Abstractly, I get what they’re thinking: they have an application that would benefit from an expressive, terse, awesome set keywords and operators that will allow their users to be more productive. And this thinking isn’t fundamentally wrong. The productivity gain is real and definitely worth pursuing, and an intuitive language can go a long way towards making your product extremely accessible.

But here’s where I think these people go off the rails: aside from the very real NIH danger (Making your own language is cool, right? Guys?), there is a huge difference between a custom language – one in which you have to do the whole compiler contortion of lexing and grammars and whatnot – and a domain-specific language, which is more typically a set of functions and syntax that work from within another existing language to provide enhanced functionality. These two things seem a lot alike at first glance, but in my opinion, they couldn’t be more different. Why? Because when you decide to write a custom language – however simple it might seem to you right now – you are making the incredibly short-sighted statement that you know how to design a language better than all the people who have tackled this gargantuan problem before you. I don’t doubt that you know your domain better than anyone else, and that’s definitely what you need to get started, but what you probably don’t know is what you’re going to need later that will totally change your language. Or how best to implement recursion, scoped variables, memory management, or exception handling. The list could go on forever.

Let’s look at a concrete example. Lots of people in the 3D printing/maker community use OpenSCAD, an open-source 3D solid modeler with a decidedly programmer-tailored interface. Makers love it, because it’s powerful, fairly simple, and gives you really repeatable results. It uses a totally custom scripting language that is basically C-like: nesting, scope, function calls. But in combing through some of the syntax and reading the mailing list, I get the impression that a nontrivial amount of the developers’ time is spent reinventing features like variable assignment and for loops that could instead be spent actually developing the application itself.

To be totally clear, I love OpenSCAD, and I’m going to keep using it. That doesn’t mean that I don’t wish the developers had decided to write a DSL instead. If they had decided to embed their functions in a nice Ruby DSL, instead of having to figure out how to deal with the quixotic features of the native dynamic length lists, I could leverage all of the existing resources – community-vetted documentation, libraries, debugging and editing tools – and it would just work. As a user, I could just focus on learning the portion of the new syntax that applies to the specific domain, rather than also having to scramble to try and figure out how to do the things I already know how to do in other languages.

It’s clear that some folks out there get this right and some get it wrong. Thrift and Protobuf both have their own IDLs, which work well enough, though the code involved in analyzing IDL files is decidedly non-trivial. OpenSCAD and others like RapCAD have plowed tons of time on their own custom languages. Map/Reduce productivity tool Pig is a nightmare: since it’s not Turing complete, whenever you want to do something not imagined by the developers you have to make the significant development context switch into regular Java to make user-defined functions. Conversely, Cascading is a wonderfully usable and extensible pure-Java DSL for composing complex Map/Reduce workflows with arbitrary UDFs that don’t require you to context switch. (Even the splendid Clojure wrapper for Cascading, Cascalog, has the sense to use the existing Clojure language to give you an honest-to-god Turing complete language to work in.) Cassandra has CQL (which I admittedly haven’t used) while HBase has stuck with a solid functional API and has a JRuby REPL in which you can use it.

So next time you’re thinking about dusting off your context free grammar skills and busting out your favorite compiler compiler, just don’t do it. There’s an easier way.

Maker to Maker Business: Customer Service

When you start making something, there are a million things on your mind – minute design details, which parts to use, how to operate the tools, what it will take to assemble. All these problems are vital to the success of your product, and to a maker, they are inherently exciting: each decision is another tiny love letter to the unique awesomeness of your project, each an opportunity for error and complexity, but also for wonder and satisfaction.

Something you are probably not thinking about is customer service.

Ugh, customer service…

Let’s be very clear about this: selling your product involves a great deal of customer service. This might come as a shock to you, since so far you’ve been engrossed in the process of actually making your product, and it’s only when you list your first item for sale will it hit home just how much other work there is to do.

This realization can be a bit demoralizing initially, because in a lot of ways customer service isn’t actually part of making anything. It’s just a peripheral aspect of the process of selling your product, and as a maker, chances are that it’s the making part that got you started in the first place. But customer service is a crucial part of your maker business, and not something you can ignore.

This rest of this post is devoted to some practical tips we’ve learned in the process of operating our business. A lot of these concepts apply specifically to the DIY/maker business, but some of them are applicable to businesses in general.

Customer service is a product, too

It’s important to consider your customer service a product of your business. When your customers speak about their dealings with you, whether it’s on a feedback form or face-to-face with their friends, they’ll be rating both your product and their experience with you. 
Think of all the customer service interactions you’ve ever had. Chances are most of them were “good enough.” But those aren’t the ones you remember. It’s the amazing ones and the awful ones that stick with you. Don’t settle for a “good enough” customer service experience. After all, would you ship a “good enough” product, or do you want your business to be known for offering the best there is? If you try to go the extra mile to make your customer service excellent, it will pay for itself in a boosted reputation, happy customers, and additional sales.

Love your customers

It can be difficult to approach customer service with the right attitude. Every email you have to respond to takes time away from actually building your product.

The easiest way to get your head straight is to remember one simple thing: you love your customers. After all, they have a nigh-unlimited set of options, yet they eagerly forked over their hard-earned money to buy something you designed and manufactured. How cool is that? 

Once you’ve decided to love your customers, a lot of things get easier. In every interaction, you should always make it clear to them that you genuinely appreciate their business. When your customers have issues, you should always start off by apologizing, regardless of whether the problem is your fault. From their perspective, every problem they have with your product will be your fault, no matter what it is. Starting with an empathetic statement puts you on the same team as the customer. And then even if you have to give bad news later, you’ll at least have started out on a good foot.

Respond promptly

Responding to your customer service emails quickly is really important. A lot of times, surprising your customer by getting back to them within a few hours will really impress them and help you to reduce their irritation. When someone takes the time to send you an email with a complaint or question, it’s because of something that’s on their mind, and that’s going to stay with them for a while. The more quickly you can address it, the less of a strain it is for them.
When possible, try to reply to emails as they come in. If that’s too difficult, then you should at least answer all new emails every day, even if just to tell them you got the message and are working on a solution.

Take complaints to heart, but don’t take them personally

There is a 100% chance that you will get an irate email from a customer at some point. Your product will break in shipping, or get shipped to the wrong address, or be the wrong color, or one of a thousand other problems. They will be angry, they will be demanding, and sometimes they’ll even be downright rude. All of this can make you feel terrible, especially if what they are complaining about is actually your fault.
Feeling terrible is the last thing you want to do, though. This is something I learned back when I played a lot of online poker: it’s OK to feel bad intellectually about making a mistake, but you need to keep a fair amount of emotional detachment so you can make good decisions. Otherwise, you’ll find yourself making knee-jerk reactions that lose you both your customers and your hair.

When dealing with complaints, the first thing you should do is apologize and offer a remedy. Next, you should analyze the mistake and change your process so it doesn’t happen again next time. And then you should move on.

Stand up to your customers

Once in a while, you’re going to be up against a customer who is just plain being unreasonable. Some examples we’ve seen are customers asking for massive customization or complaining about our posted return policy after the fact. In our experience, these customers are really few and far between, but when you do run into them, they add a lot of stress.

Generally, I would say that you should go to lengths to provide a good customer experience, but sometimes that can go too far. In practice, only you will know the difference between making an exception to give someone a great experience and compromising your prior business decisions. But whatever you do decide, deliver the news clearly and calmly, and don’t let any irritation color your communication.

A Software Man In Hardware Land

My whole career has been spent working on software, first as a small-time consultant in high school and now as a software engineer and manager at Rapleaf. Though I’ve always harbored an intellectual soft spot for more physical engineering pursuits, I’ve never had more than passing occasion to indulge them.

That is, until recently, when Adam and I founded 8 Bit Lit, our little lamp-making business. Together we took what we thought was a really cool idea from concept to prototype to limited production run, and I have to say that while in some ways engineering is engineering, in other ways, the work I’ve done up until now did not prepare me for the stark differences between producing a software project and a hardware one. This post outlines the three of things I found most interesting between hardware and software projects: time, scaling, and repeatability and undoability.

Time

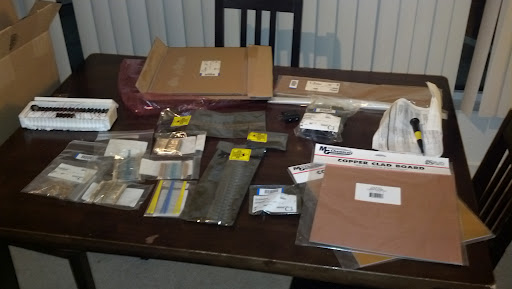
The first of what would turn out to be many parts orders.

There is a fundamental difference in the amount of time consumed by a hardware project and a software one. Everything ends up taking far more time than I expected: design and development, prototyping, assembly, packaging, delivery.

I could go on and on about each of these, but for the sake of brevity, let’s just look at the development idea as a concrete example. When you decide you want to make a little electronic widget that does something, even something trivial, you design the circuit and then figure out what parts it will take. And then, since they’re actual, physical things, and often quite specific ones, you have to wait for those parts to show up. That means waiting a for another person somewhere else in the world to put the thing you need into a box, hand it to another person who will drive it somewhere else in a truck, and so on until it arrives at your door. Even if you pay exorbitant shipping costs, you’re looking at many hours to a few days of latency between when you decide what you want to build and when you can even try it for the first time!

Contrast this with the software world. In most cases, there is no difference between your “design” for the thing and the thing itself: the source code for a website is already a website. Everything you need is already on hand in infinite supply – you can have as many for loops as you’d like, and your personal computer is usually sufficient to test what you want to accomplish. Occasionally you might find yourself needing a specialized piece of code written by someone else, but even in these cases, it usually just means downloading a library from the internet, which takes seconds to minutes.

This is a huge difference in terms of your ability to iterate quickly and try out ideas. In software, you can go from no idea at all to a functional prototype in as long as it takes you to figure out what you want and code it up. In hardware, there’s a built-in latency barrier that makes more forethought a requirement. This means your prototypes have a higher inherent cost, slowing you down.

Some would point out that this problem can be solved by “libraries” of development parts: resistors, capacitors, and ICs of all different values and function stored in boxes on shelves. In practice, though, this part library has to be vast and a little expensive to give you more than basic coverage, and even with such a library, you’re unlikely to be able to carry any of the really specialized stuff that’s coming out all the time. Again, in the software world, you get this kind of library almost for free through the internet, and even when you can’t always be connected, the sheer number and variety of libraries you would be able to keep trivially accessible is enormous.

Scaling

In many ways, the scaling process is one of the things that is most challenging to me. In software, much of scaling is handled by just throwing more processing power at the problem. Your website will have 2x as much traffic next year as this one? Double your number of servers. (Certainly there are ways in which software projects must be constructed to allow for this kind of scaling, but there are lots of frameworks designed to help you do this.)

Contrast that against the construction of a physical object. Need to make 2x as many? Does that just mean hiring 2x as many people to assemble them? Well, maybe. But it also means training those new people, and they’ll have an efficiency ramp-up period where they’ll produce less units or unshippable units or probably both. Or should you change your assembly process to be twice as efficient to create each unit in the first place? Do you have the tooling for that? Can your facility even handle 2x as many people or machines working on the products?

Software projects face some of the same problems, but the slope of their curve is so much flatter. Many, many computers can fit into a very small space and serve a great deal of requests, and as long as you’re operating from a colocation facility, there’s likely to be a large amount of space available to grow into. And that’s not even considering so-called cloud offerings, where you can trivially add more capacity to your systems with the click of a button.

Repeatability and Undoability

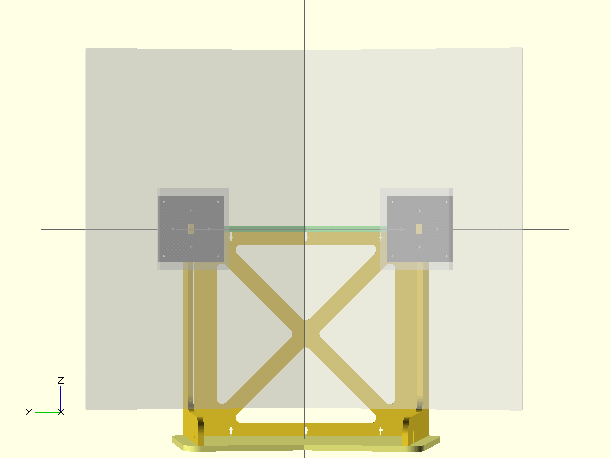
Try un-etching a circuit board.

I think these two are especially poignant. First, repeatability. I think of repeatability as the ability to have a process you’ve designed produce the same output from identical inputs over and over again without problems. In software, this is almost a given. It’s so intrinsic that we use it to make automated tests for ourselves to make sure things keep working – if the results all of the sudden come out differently, then we must have broken something. And generally speaking, the outputs of computer processes don’t degrade over time, even though their hardware does – they’ve been designed to tolerate errors or to fail very noisily when it’s impossible to keep going gracefully.

With physical processes, though, especially those done by hand, repeatability is not to be taken for granted. Even though a process may be designed in a perfectly repeatable pattern, reality insists on imposing random failures. This is because in the real world, there are far more variables than we can reasonably take into account. For instance, let’s say you’re hand-gluing the sides of a box together. Maybe this time, you didn’t use enough glue. Or maybe the clamp you’re using is wearing out, so the sides don’t get good contact. Or maybe one of the sides was made from raw materials with intrinsic flaws, invisible little cracks that doom the part to failure. These problems arise even when a person is not responsible for the actual labor – maybe your milling bit finally snaps from wear or material variations give you an unacceptable result. The bottom line is that these things are difficult to account for.

Similar to repeatability is undoability. I think of undoability as the ability to reverse an erroneous process such that you can fix things and move on. When you are working on a software project, mistakes are often almost trivial to reverse: you click the “undo” button, or you revert your changes in your source control manager, and you’re back to where you were. Because your actual work output is data – either code or the results of your processes – making copies is fundamentally cheap or free, which means that with a little care, you can trivially protect yourself from losing everything to mistakes. This makes your mistakes very cheap – so cheap, in fact, that its often reasonable to just try something that might not work out, since you can always just go back.

The real world is not so forgiving. Many physical processes are not trivially reversible, if at all. If you glue a box together inside out, then there’s a good chance it’s going to stay that way and be a total loss. Sure, a $4 plastic box may not be a big cost for a random experiment, but what about a $50 ethernet module? Now you have to think carefully about how a failed test could be made reversible. This has significant implications for design and production, if you’re used the software way of thinking of cheap mistakes. In the long run, this slows down the design process and costs you money during production.

Sometimes you can design undoability into your processes from the beginning, which can pay off big time. For instance, instead of a box you glue together, you make it fastened together with screws so you can always just take it apart if you make a mistake. However, this approach introduces its own set of costs: more complex design, more actual parts, more steps for assembly, and aesthetic compromises. You just have to balance all these factors when you’re deciding how to make your product.

Conclusion
You might think from this discussion that this experience has shown me the absolute superiority of software projects over hardware ones. Nothing could be further from the truth. Despite the difficulties, there’s definitely an element of satisfaction I’ve found from this project that isn’t something easily gotten from software, even from the coolest projects I’ve done. There’s something about producing an actual, tangible thing at the end of the day that will keep me striving to get better at the process and hone my craft, no matter how difficult it is.

One-transistor audio amplifier for Arduino projects

For my recent Question Block Lamp project, I wanted to be able to play sound effects. Initially I was a little concerned that it would be difficult, but after I found the awesome Mario Piano Sheet Music project and Arduino’s tone library, it looked like everything was going to be super easy!

However, after writing the code and wiring up the circuit, I ran into a little problem: the sound that came out of the speaker was too quiet. It was audible, but wasn’t exactly robust, and that was with it into my breadboard. Installed, the speaker was going to be stuck on the inside of a 3mm acrylic box, so it seemed like there was significant risk of the sound effects being inaudible.

Sound volume is directly proportional to current. When you’re hooking up a speaker to an Arduino as described above, the reason for the softness of the sound comes down to the fact that the digital out pins on AVR microcontrollers (ATMegas for official Arduino boards, or the ATTiny in my case) can only source or sink around 50 mA, which is why the tone examples have you hooking up the speaker through a 100-ohm resistor. Most speakers, including the cheap ones at RadioShack, can handle a lot more current than that, and without the resistor you’d probably fry the pin on your microcontroller.

So the problem has an obvious diagnosis, but what about the solution? I’ve read about audio amplifiers in the DIY context in the past, but truth be told all that did was make me nervous. I thought it was likely to be complex, require a number of additional components on the board, and would add cost to the project.

Yet again, it turns out that I was over-thinking the problem. In most cases where you need to use a professionally designed audio amplifier, the audio is a complex waveform, and the way you amplify it can radically change how it sounds. But when you’re using Arduino’s tone library, your waveform is actually incredibly simple: it’s nothing more than a square wave that swings from +5v to ground on the frequency of the note you’re playing.

What’s so great about that? All you need to do to amplify the current of a square wave is a single transistor. It’s really easy to wire up: just connect the Arduino’s output pin to the transistor’s base pin through a 100-ohm resistor, then the collector pin to +5v and the emitter pin to the speaker’s + lead.

This solution costs almost nothing and is staggeringly effective. When I tested it, there was a clear, significant volume increase. Even from inside the sealed box, it was more than loud enough to get the job done. Isn’t it great when things work out so well?