For my recent Question Block Lamp project, I wanted to be able to play sound effects. Initially I was a little concerned that it would be difficult, but after I found the awesome Mario Piano Sheet Music project and Arduino’s tone library, it looked like everything was going to be super easy!
However, after writing the code and wiring up the circuit, I ran into a little problem: the sound that came out of the speaker was too quiet. It was audible, but wasn’t exactly robust, and that was with it into my breadboard. Installed, the speaker was going to be stuck on the inside of a 3mm acrylic box, so it seemed like there was significant risk of the sound effects being inaudible.
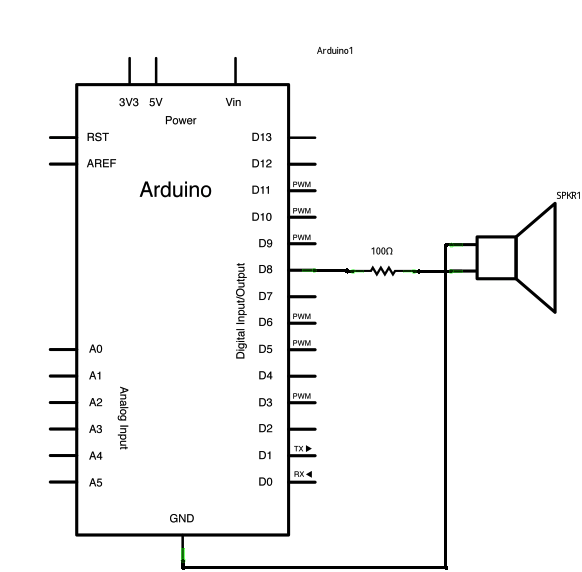
Sound volume is directly proportional to current. When you’re hooking up a speaker to an Arduino as described above, the reason for the softness of the sound comes down to the fact that the digital out pins on AVR microcontrollers (ATMegas for official Arduino boards, or the ATTiny in my case) can only source or sink around 50 mA, which is why the tone examples have you hooking up the speaker through a 100-ohm resistor. Most speakers, including the cheap ones at RadioShack, can handle a lot more current than that, and without the resistor you’d probably fry the pin on your microcontroller.
So the problem has an obvious diagnosis, but what about the solution? I’ve read about audio amplifiers in the DIY context in the past, but truth be told all that did was make me nervous. I thought it was likely to be complex, require a number of additional components on the board, and would add cost to the project.
Yet again, it turns out that I was over-thinking the problem. In most cases where you need to use a professionally designed audio amplifier, the audio is a complex waveform, and the way you amplify it can radically change how it sounds. But when you’re using Arduino’s tone library, your waveform is actually incredibly simple: it’s nothing more than a square wave that swings from +5v to ground on the frequency of the note you’re playing.
What’s so great about that? All you need to do to amplify the current of a square wave is a single transistor. It’s really easy to wire up: just connect the Arduino’s output pin to the transistor’s base pin through a 100-ohm resistor, then the collector pin to +5v and the emitter pin to the speaker’s + lead.

This solution costs almost nothing and is staggeringly effective. When I tested it, there was a clear, significant volume increase. Even from inside the sealed box, it was more than loud enough to get the job done. Isn’t it great when things work out so well?
