

I bought a Shapeoko 2 about six months ago. One of the things the mistakes I made on day one was the lack of a permanent, high-quality bench for it to live on. Not thinking ahead, I built my SO2 on top of a knock-down bench I built for doing “dirty” tasks – it’s just a sheet of 3/4″ particle board on top of two sawhorses. Permanently attaching a CNC machine to a floppy surface turns out not to be the best call, and I’d rather have the dirty bench available for assembly projects anyways.
So it was time to build a permanent bench. Here are the key features I decided on:
- Sturdy. No sagging surface or rickety legs. I want this thing to be able to survive the rigors of daily use and future moves.
- Mobile. It’s got to be on wheels so I can push it up against a wall when I need to.
- Extra storage below. I’ve accumulated a few boxes of SO2 stuff that are best stored with the machine.
- Convenient hookups. Should have on-board power strip and integrated cord. Also, let’s add in a permanent vacuum line so we can put a debris collector on the toolhead.
- At least moderately attractive.
- Cheap.
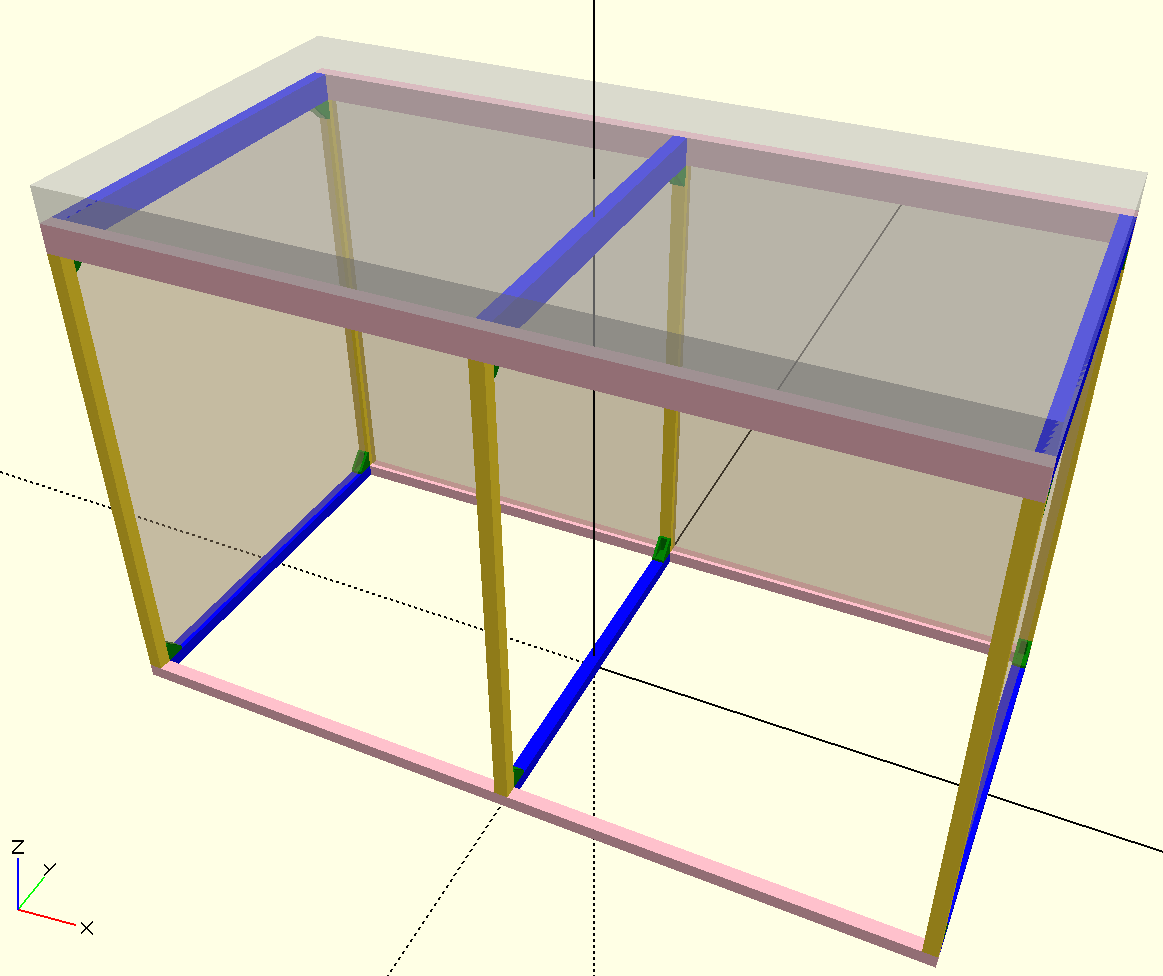
Concept render of aluminum extrusion version.
While I first considered building a bench out of aluminum extrusion, after spending a few hours planning and pricing, it wasn’t going to work out. It would be too expensive and not that sturdy. It also didn’t help that the materials would have to be special ordered and couldn’t easily be cut with the tools I have on hand.
Ultimately, I settled on regular dimensional lumber for the project. I don’t usually consider 2×4 benches to be terribly attractive, but by squaring them off to 3″ x 1-1/4″ with my table saw, I ended up with a much more acceptable-looking piece of wood. Also, instead of butted-and-bolted joints, I decided to try out some table saw joinery techniques and opted for a half-lap approach. The best part of dimensional lumber is that 2x4s cost less than $3 / 10′ and are available at the local hardware store.
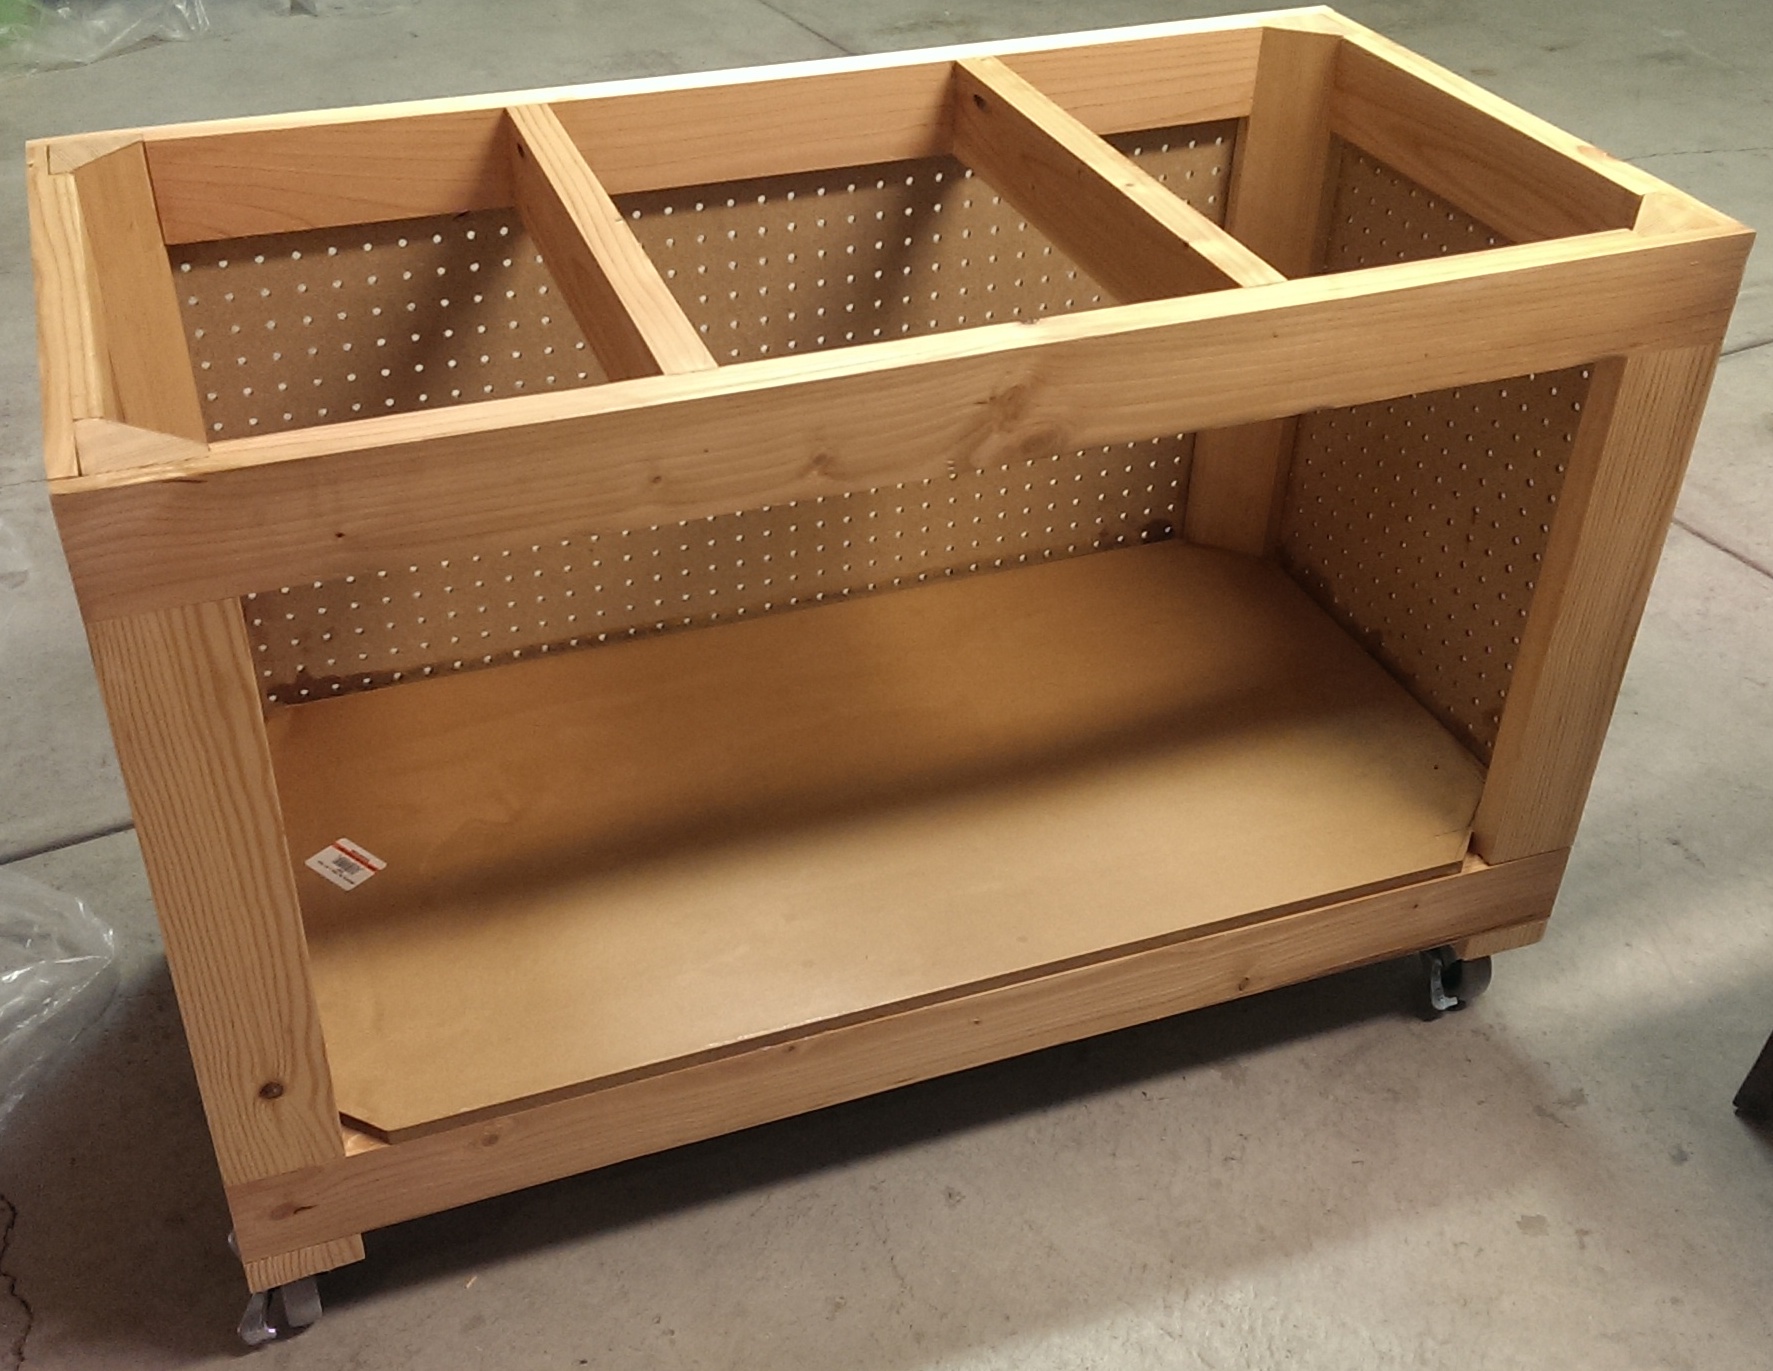
Frame all glued up and put on wheels.
The design itself is very simple. The four corner posts are made of 4x4s resawn down to 3″x3″. All the horizontal beams are resawn 2x4s. Both the posts and beams have half-laps cut in their ends using my table saw’s crosscut sled and a dado stack. (The corner posts are half-lapped from two sides.) I added some midspan supports to make the top and shelf even sturdier; those are connected with glue and pocket screws. The rest is all just wood glue.
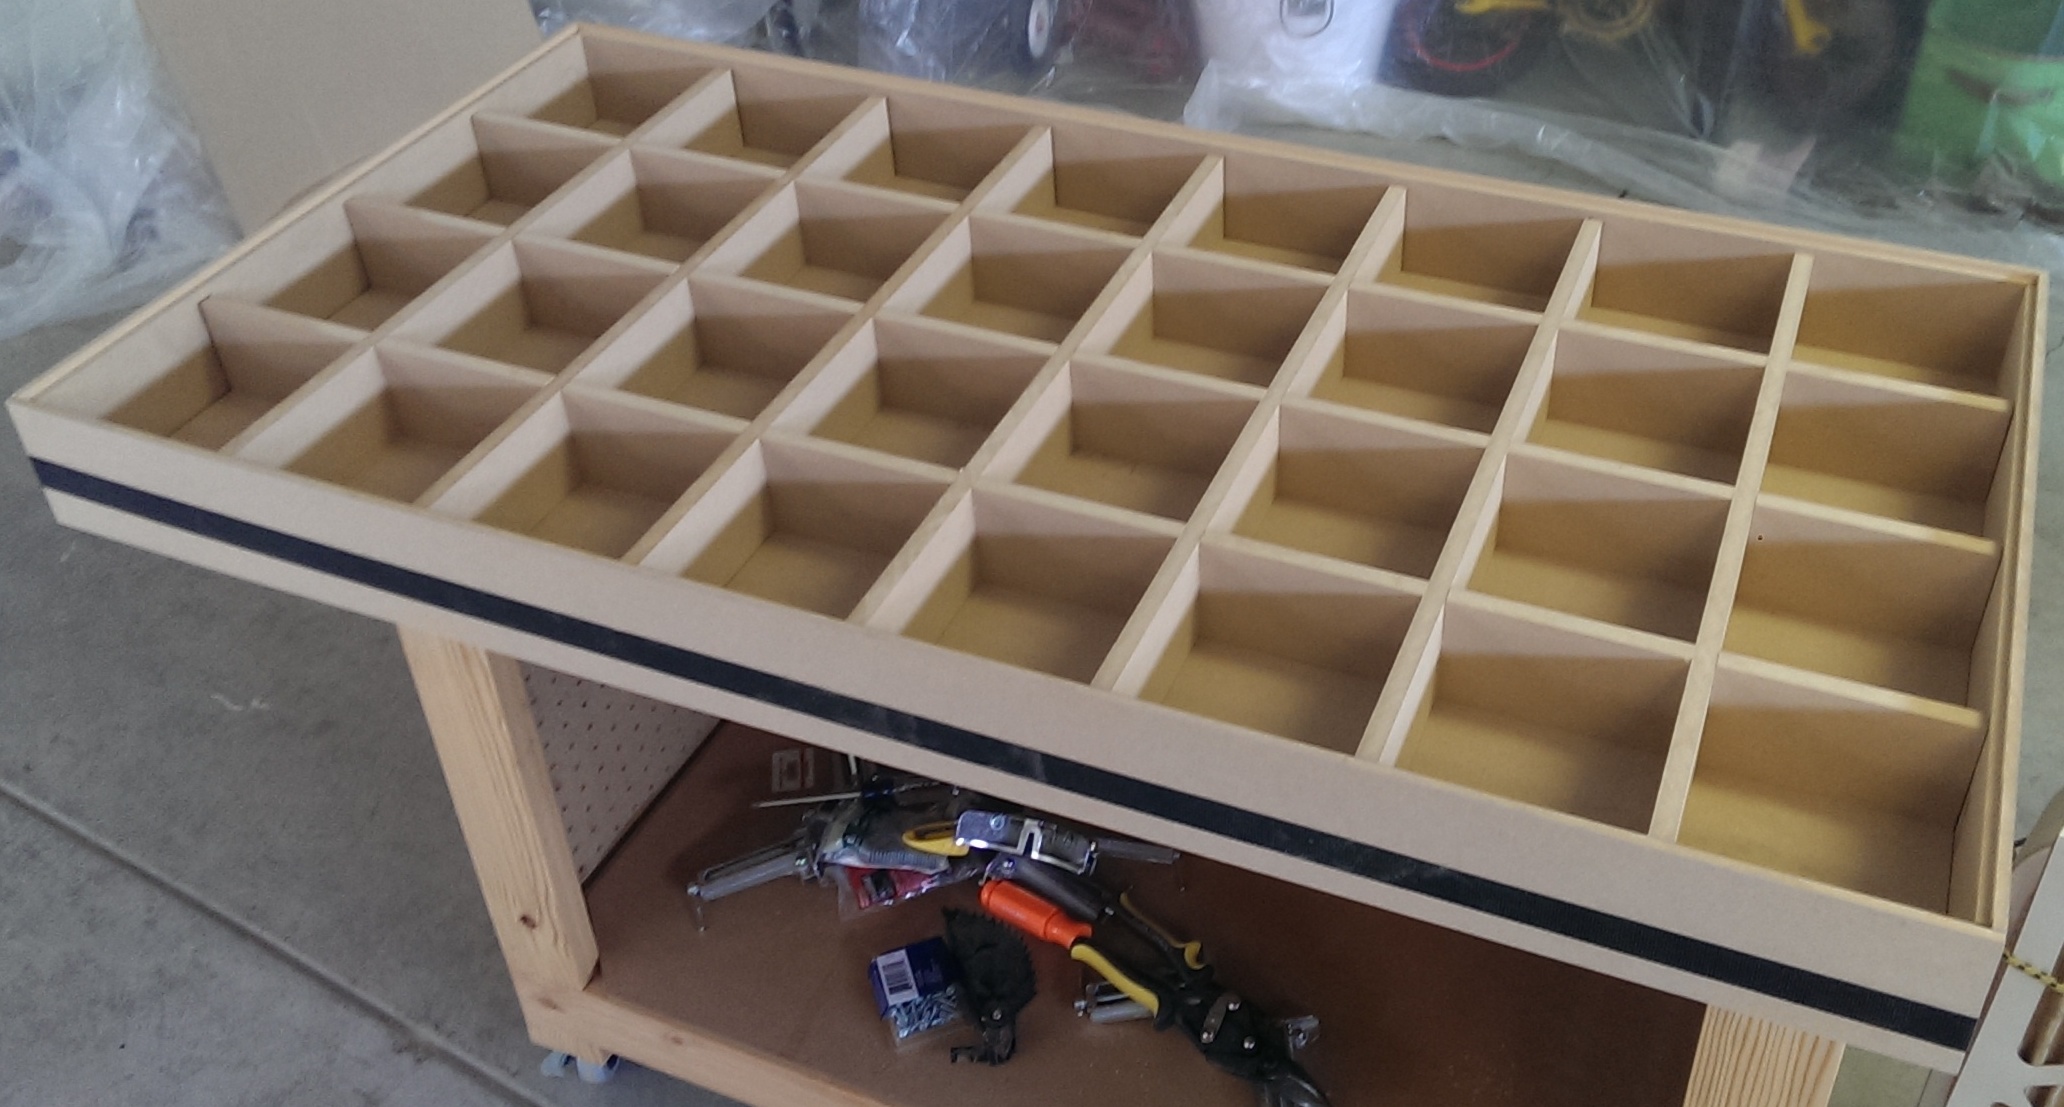
Inside of the torsion box before the skin was glued on.
The bottom shelf is a piece of 1/2″ MDF, but the top of the bench is more exotic. It’s a 24″x48x4″ torsion box made from 1/2″ MDF, including the skins. Inside, there’s a grid of ribs on 6″ centers. The ribs fit together with half-lap joints as well, which I cut on my table saw’s crosscut sled with an improvised indexing jig to get reliable spacing. All together, this work top is probably the single sturdiest thing I’ve ever built, and it is not absurdly heavy. It’s exactly what I want to serve as the basis for my CNC. The torsion box is attached to the frame with a few brackets and screws. Put together, the cart has a very solid feel to it. Finally, there’s a set of locking casters on the bottom of the corner posts to make it mobile.

Fully assembled glamour shot


After I had the cart rolling around, it was time to transplant my Shapeoko 2. This part had me a bit worried, since the existing parts had been wired together in place and didn’t have much slack. I ended up taking advantage of a little extra space underneath the torsion box by making a “hidden” compartment to stash the spindle and motor power supplies. I attached a power strip to the frame and ran the cable out through a hole in the bottom, then made a hole in the torsion box surface for cables from the control panel to reach inside. This turned out to be a huge pain, since I had to go through one of the vertical ribs to get inside of the frame. If I ever do something like this again, I’m definitely going to plan in advance and make the holes before gluing the skins.
In all, I ended up routing the motor supply, spindle supply, and e-stop hookup down through the box, into the frame, and into the secret compartment. This really cleans up all the stuff that used to hang around next to the control panel and makes it easier for me to slide the Shapeoko2 itself as far to the edge of the work surface as possible. (This is important because I am planning to eventually extend the machine to 1000mm in the x-axis, and that just about fills the entire width of the surface.)
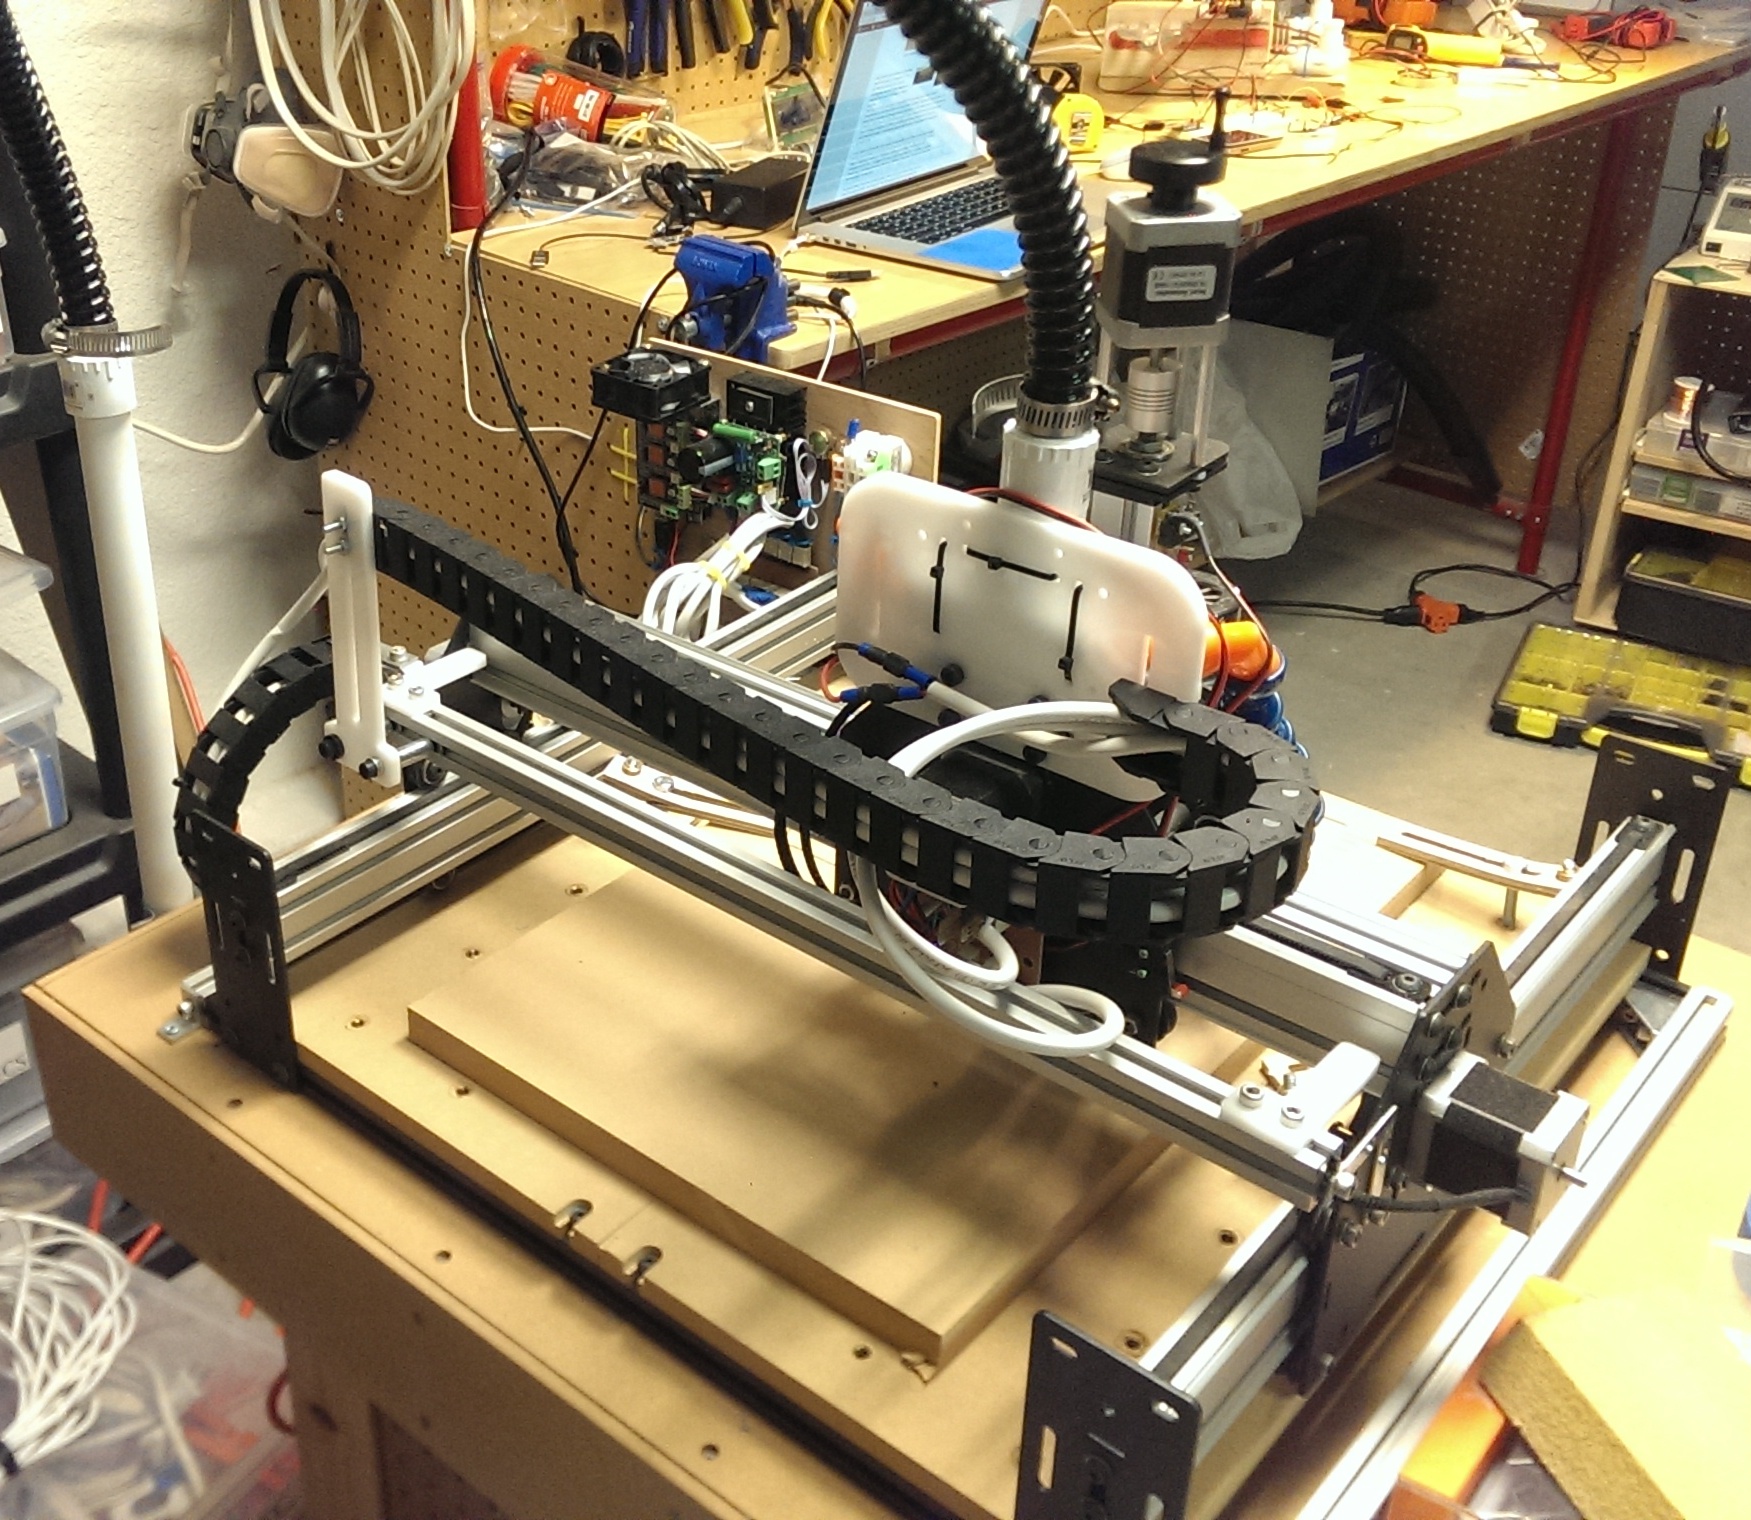
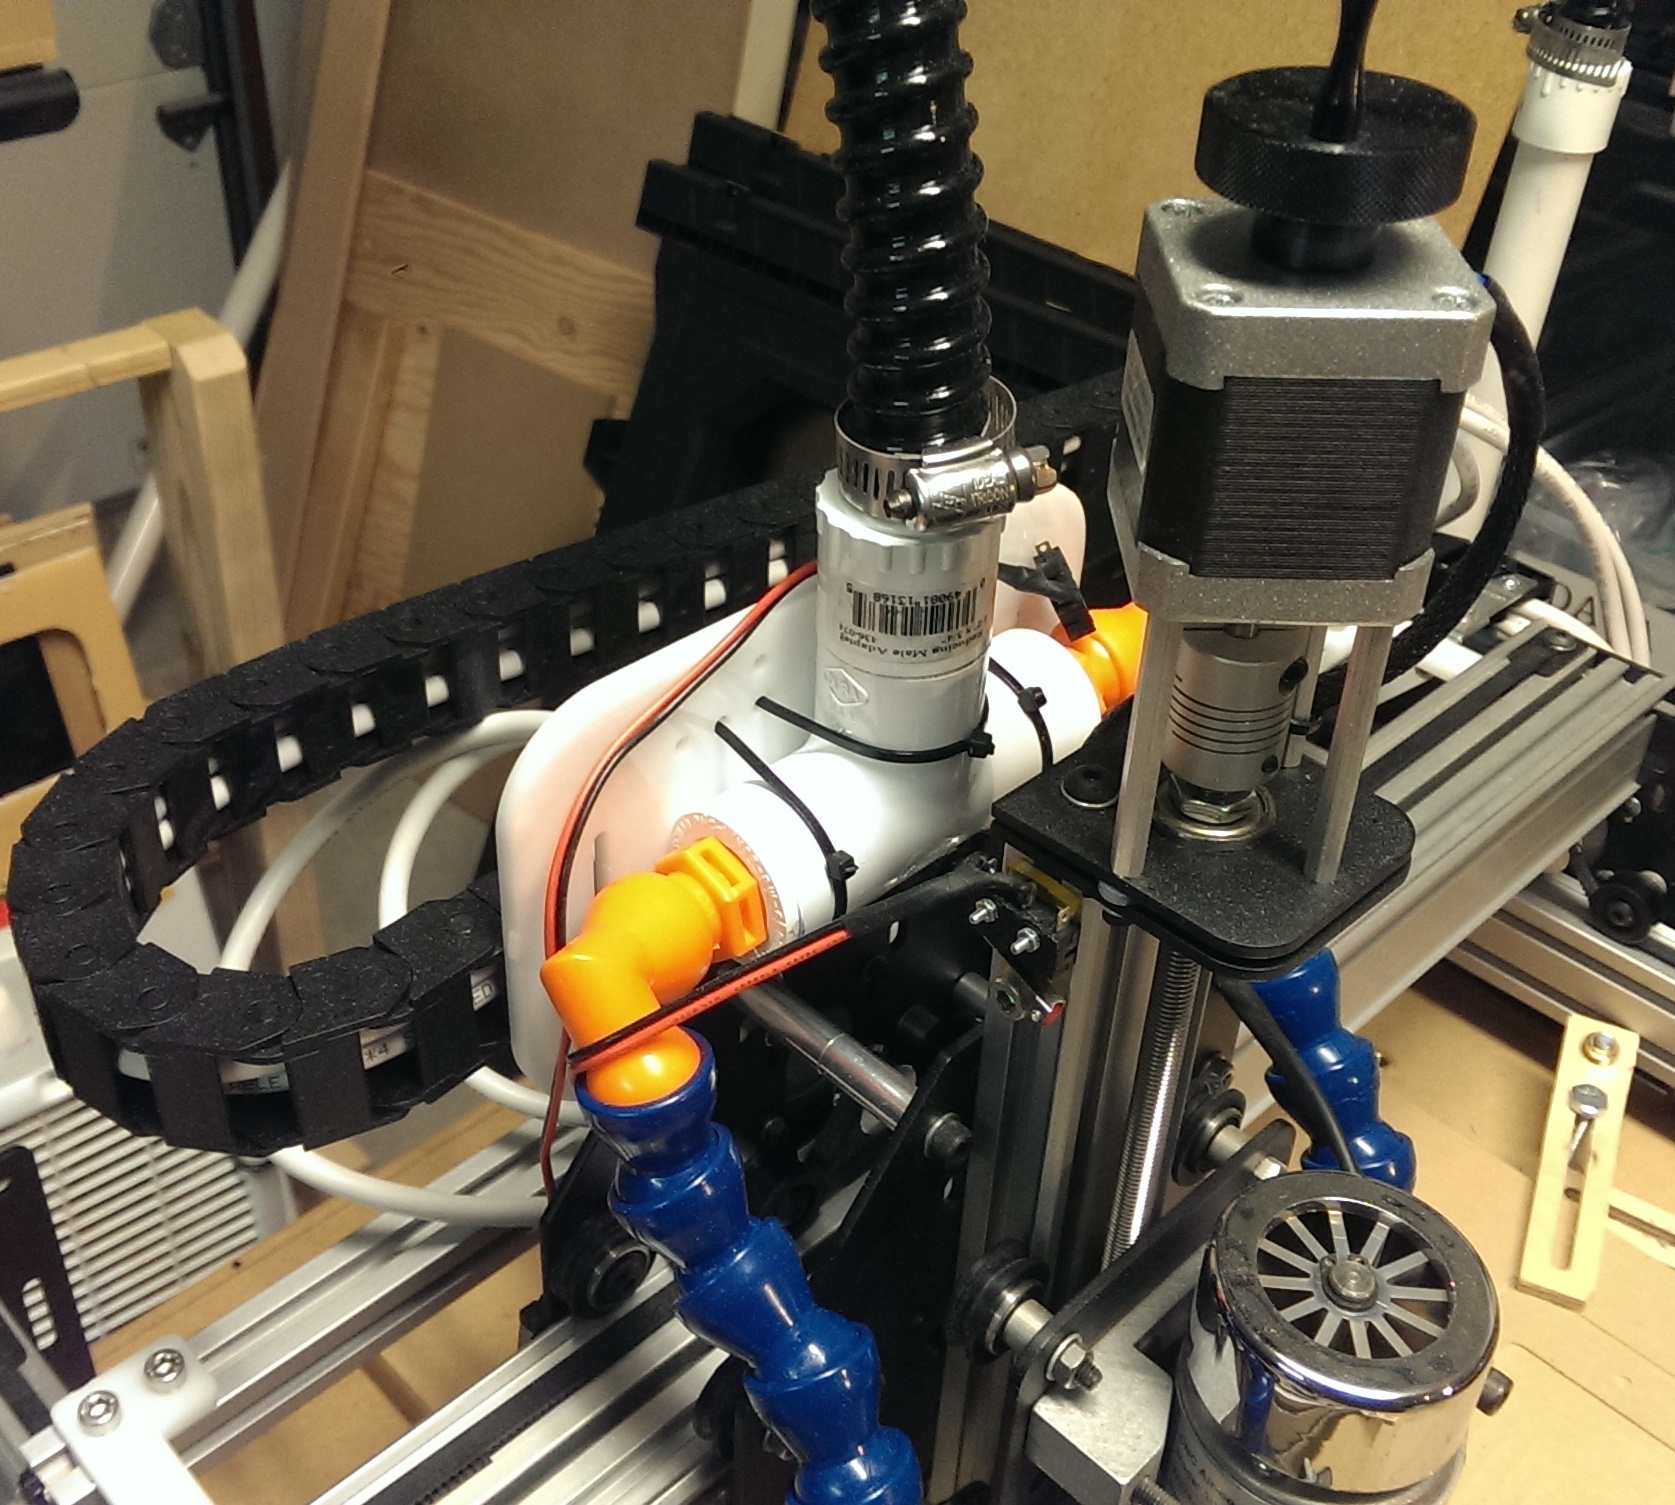 The final touch was the debris collection system. I saw a forum post about using Loc-Line to make a nice debris collector that hangs out near the toolhead and decided this was the approach for me. The only part I didn’t like was how the collector moved with the toolhead. This configuration makes it hard to position the collector nozzle close to the work piece without eventually crashing into it. Instead, I decided to mount the Loc-Line in a fixed configuration that didn’t move in the Z-axis. To do this, I whipped up a mounting plate that bolts onto the back of the X-carriage and provides a hole pattern to mount the Loc-Line adapter. It also provides a vertical slot mount the X drag chain horizontally. The other end of the drag chain connects to a vertical “mast” with another long slot; the whole thing bolts to the “accessory rail” I added behind the X Makerslide. This worked great, especially if you ignore the ungainly stack of spacers and washers I needed to make the bend of the drag chain work out.
 The PVC pipe tee on the X-carriage connects to a piece of corrugated hose, which connects to a tall piece of pipe bracketed to the side of the cart. That goes all the way down to the foot of the cart and to an adapter that my shop-vac’s hose can plug right into. It works great! The only thing I would change would be to use larger diameter PVC pipe – the shop vac sounds like it’s struggling a bit due to the constriction of the current setup.
